Wichita reached record highs all week. Well, part of the week. Well, I don’t really know when records were set and when they weren’t. All I know is it’s been over a hundred degrees all week. So what do I crave? Soup! Who craves soup in the middle of a heat wave? Well, apparently me. And my sister. But that’s another story. I had a craving for potato soup. So I looked online and found one by America’s Test Kitchen. Have you ever watched this show? If you haven’t, they take a dish and try to imitate it, improve it, or do whatever needs to be done to make it the best it can be. Whether it’s replacing ingredients to make something dairy-free, improving on something (a specific episode is where they improved lo mein because it’s commonly too greasy and heavy in fast food places – an observation I agree with), or simply making the best of a certain thing. I find their scientific approach interesting and entertaining. If you’re interested, you can watch some episodes here. Unfortunately you have to pay for their recipes, but with a little work you can usually find them printed elsewhere.
Creamy Potato Soupy Goodness
Alright, so I finally found the soup I wanted to make and I was excited because I’ve never cooked with leeks before. Well, or bay leaves. I know, I know. Who’s made soup without a bay leaf? Me, OK. I’ve always thought it was kind of a waste to buy all of those leaves for one leaf in one pot of soup. This time I splurged, though. Note to self: grow bay leaves in future herb garden. Other note to self: New house needs lots of shelf space near a window for said herb garden.
I found my Country Style Potato Leek Soup originally listed on the America’s Test Kitchen site, and like I said, you have to pay for the recipes. But I found the same recipe at cooking.com (sorry, ATK, it’s not worth it to pay for recipes – if I hadn’t found yours I would have chosen another one). It said it was reprinted with permission, so I assume the ATK people don’t care that much.
But I chose this recipe by perusing the ATK recipe files and reading why they did the stuff they did and how they came up with their recipes. THIS is why I love them. They give a description of what they considered, why they did what they did, and what they came up with. LOVE. IT!
Anyway, this is all really an unnecessary history lesson. I won’t recap the recipe, other than noting where I made changes. I’m sure the soup’s delicious without changes, but I couldn’t resist.
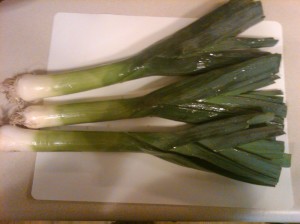
My stolen virginity with leeks, caught in picture. Hello, good leek. You’re very special to me.
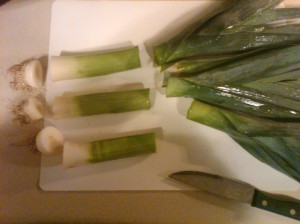
In all seriousness, you were supposed to cut off the roots and the tough green parts, keeping the white and “2-3 inches of light green.” I’m no man, but I think this is more than 2-3 inches, but I didn’t care. These bad boys were in the organic section and were’t cheap. Oh, and I was supposed to do several pounds of leeks. I only did one bunch (shown), and this was perfectly fine. This weighed just under 2 pounds.
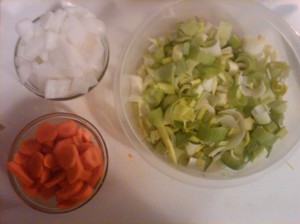
Chop-chop-choppy up the leeks. Then I separated them out some. I was supposed to have something like 11 cups. I had around 5-6. Once again, I was pleased with the finished product. But if you really like leeks, go for it!
Since I feel like soup isn’t soup without carrots, onions, celery or garlic, I added some. Well, I didn’t have celery. So I added a medium white onion and two carrots, which I had in my fridge. I was afraid I’d burn the garlic if I put it in at the wrong stage, so I sprinkled garlic powder over the whole lot once it got to cooking.
At last, the butter! This recipe calls for 3/4ths a stick of butter. Much more than I normally put in soup. But it sounds delicious, no? Plus, it’s not a creamy-based soup (although I do cave and add about 1/4 to 1/2 a cup of milk at the end), so I figured what the hell! Drop that butter in the pan and let it melt.
The butter’s supposed to foam. I started to panic that it would burn. Other note to self: Get flat top stove in next house. So as to avoid crooked cooking in dangerous times such as butter melting.
Foamy enough? The vote was 1-0 in favor of foamy.
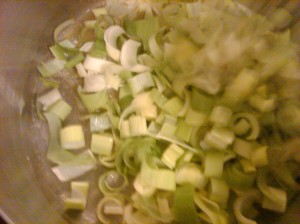
I drop in the leeks. Delicious smells ensue. Oh the delicious smells. These were supposed to cook for 15-20 minutes, until tender but not mushy. It may have been my lack of leeks, but I only ended up cooking them for about 8-10 minutes total (and that includes some cook time with the onion and carrots, as you’ll see in a second).
Leeky, buttery goodness. Hello, you.
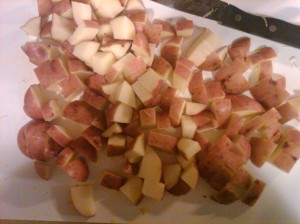
While my leeks are hanging out for their fifteen minutes of fame, I washed about 2 pounds of potatoes. I had a 3 pound bag, but I won’t lie, I did weigh them. Never fear, though. It’s potato soup. Just get a good bunch of potatoes. The Test Kitchen site specifically says use red. Who am I to argue? Besides, I LOVE red potatoes.
Chopped to 3/4 inch dice. Whatever the hell that means. I just cut them into bite sized pieces. I’m such a chef!
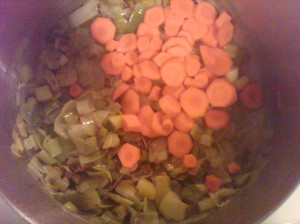
About six minutes into cooking the leeks, it’s apparent they won’t need 15 minutes, so I drop in the onion and carrots. I originally planned to drop in the carrot first, then the onion later. But once again, panic got the better of me. Panic that the leeks would get mushy, as I was warned to avoid. And who am I to ignore America’s Test Kitchen’s warnings?
So I said, “Screw it.” And dropped added the onion as well. Stir, stir, stir. Delicious smells get deliciouser!
Deliciousness in picture form.
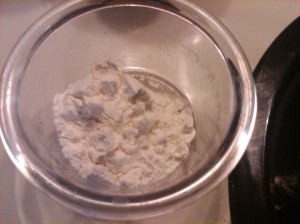
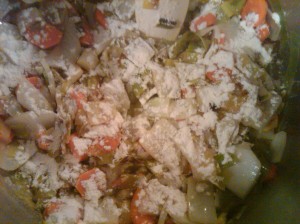
OK, so after the leek (and carrot and onion, in my case) is done cooking you’re supposed to add some flour over the veggies and stir it in until it dissolves. I had plans to use 8 cups (2 big containers) of chicken broth, rather than just the recommended 5. Mostly because I like brothy soup, especially since the water seems to absorb into the carbs when you store it in the fridge. I went ahead and did the 1 Tbs at this step. But I did add another Tbs (in a flour-water paste) right before removing the soup from the heat. So note to self on that (I’ll mention it later.)
Don’t worry, the flour quickly dissolves…
After the flour dissolves, add the chicken broth and potatoes and bring back to a boil. This is where I added my bay leaf. When it comes to a boil, you reduce the heat, cover and simmer. And I won’t lie, the bay leaf adds a very “soupy” smell to my kitchen. I suddenly feel like a housewife in the 50s. Go me!
After it simmers, you remove it from the heat, cover again, and let it sit for about 10 minutes so the flavors can meld. Or so they claim… Remember, if you want your soup thicker, before you remove it from the heat add your flour-water paste. I did about a tablespoon more of flour, and just enough water to make a paste. Make sure it dissolves before removing the pot from the heat.
Another important note: Before I removed it from the heat (during the simmering stage) I also added about 1/2 a cup of elbow noodles because my mom always had macaroni in her potato soup. This is a totally optional step. But I also used this stage to add salt, pepper, more garlic and red pepper flakes to taste. You’re not supposed to season until the end but I wanted to now, so all of those flavors could meld as well.
Final note: After all of the boiling, but before melding I also added an optional 1/4-1/2 cup of milk. I decided I wanted my soup at least a little creamy.
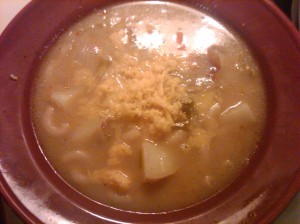
And there she is. With fresh-graded Tilamook cheddar cheese. Kristy knows tasty; she introduced me to this cheese and I can’t go back!
Close up of the creamy, cheesy, potatoy goodness.
And, finally, I crushed some Hot & Spicy Cheez-It crackers on top. Mostly because I read somewhere that these are the crackers to eat with potato soup, so I couldn’t get them out of my mind. But also because, well, yum!
Words can’t express what you mean to me, potato soup.
Finally, amidst all of this soup-cookin’, I also had some rolls in my bread machine. You could really use any rolls, but this is the recipe I used. Please be aware, I’m not sure whether the appropriate word is raise or rise. So don’t be annoyed at my misuse. I decided to use the two interchangeable so as to get it right at least half the time.
Anyway, I follow the recipe, except I melt my butter (then let it cool a little so I don’t kill the yeast or curdle the milk), and I DON’T warm the milk. I put it all in my bread machine, and mix it like on the dough setting. I use my wooden (well, plastic) spoon during the start of he mixing stage to make sure all of the ingredients mix together. And I let it rise with the dough setting, let it rise a second time for about 45 minutes, then shape into rolls, and let it rise a third time. (In the cooking world this is called DOUBLE raising. Don’t ask why, because I don’t know.)
And if you use whole wheat (I usually do 75% whole wheat, 25% white), then I add 3 Tbs of vital wheat gluten to the recipe along with the flour. This helps everything raise better, and makes the resulting bread (or rolls in this case) not so heavy. So you still get the yummy whole wheat flavor without the rolls tasting, dense, dry or heavy. If you like whole wheat but your bread never turns out, THIS is what you’re missing. Add 1/2 – 1 Tbs of vital wheat gluten (sold near the flour in the grocery store) to the recipe.
Oh, one other whole wheat-related footnote. I always weigh my flour, rather than measuring it with a measuring cup. One cup of flour is 4.57 ounces. I guess if you measure whole wheat flour you’ll end up with too much. You want your bread dough to be fairly sticky (not so sticky it sticks to you or the counter, but as sticky as it can handle). The drier your dough, the drier your bread. So keep that in mind!
And there’s no trick to making rolls. Just roll out your dough and cut it into as many pieces as you need. I then roll them into balls and place them equal-distance apart in a pan. Make sure you spray your pan first!
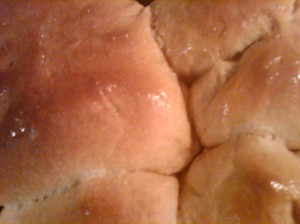
Here are the rolls fresh out of the oven. My oven cooks a little uneven. I was watching some crap on TV so I didn’t get in to flip them around. But nonetheless. They look (and smell) scrumptious. Of course I top with butter while they’re still warm.
Seriously, is anyone else having Thanksgiving flashbacks? Where’s mom’s homemade dressing?
I always separate my rolls and let them cool on a wire rack so they don’t get soggy.
This is the best I could do with a close-up.
Alright, that’s it. Soup’s on! ENJOY!
















Okay, so I’m not a HUGE soup eater, but I’d definitely eat that soup… and the rolls? Umm.. give me a dozen, please. Those rolls look A-mazing!
How can you not like soup?? Who are you? The rolls are so delicious. Except all I could think about while they were baking and all night was that I wanted homemade dressing. Not good. So instead I was shoving every carb I could get my hands on in my face. Ah well. I’ve been eating the rolls with soup. AND have been using them for ham sandwiches. SAMICHES!
I could eat a whole bowl (or two) of that soup right now. And, I agree with Karla, give me a dozen of those rolls, I could find many, many ways to eat them. Please eat one with butter and cinnamon & sugar… lots of butter and cinnamon and sugar. And one with butter and honey and one with, oh alright, i’ll stop, but yum!
I’ve been really enjoying them with ham and this chipotle cheese I found. I haven’t had a craving for sweet, yet. But that could be because I’ve been inhaling Jolly Ranchers.
The soup and rolls both look great! Now I have to go find something to stuff my face with!